Fun Crafts to Do with Your Foster Child

Introducing a new foster child into your home can be both exciting and challenging. While you help them adjust to their new environment, it’s important to also spend quality bonding time together. Crafting is a great way to connect and make memories. Here are six fun crafts to try with your foster child.

1. Get Creative with Duct Tape

Duct tape crafts are inexpensive and allow for lots of creativity. Make wallets, bracelets, bowls, picture frames – anything you can imagine! Let your foster child pick out colourful tapes to design something unique. Help them make duct tape flowers by cutting strips and assembling them into a flower shape. These bright flowers make lovely gifts for caregivers and caseworkers.

2. Make Homemade Playdough

Mixing up a batch of playdough is the perfect rainy-day activity. Add a few drops of food colouring so your foster child can create playdough in their favourite hues. Set out cookie cutters, rolling pins, and beads so they can shape and decorate their dough creations. When you are finished, store the playdough in an airtight container to keep it fresh for next time. Playdough helps develop fine motor skills.

3. Paint Kindness Rocks

Gather smooth stones and set out acrylic paints. Encourage your foster child to paint inspiring designs on their rocks – anything from animals to affirmations. Once dry, deliver the rocks around your community by hiding them in parks or other locations. Painting rocks spreads cheer and gives your foster child a fun project to be proud of.

4. Make Photo Books

Look through old photos and have your foster child help select their favourites. Print and assemble the photos into a homemade book. Let them decorate the cover and add any special details. Whenever they need a reminder of happy memories, your foster child can read through their custom photo book. A photo book also makes a thoughtful keepsake to take when it’s time for them to leave your home. You may find that your agency for fostering in Glasgow actually encourages you to help them record significant life events.

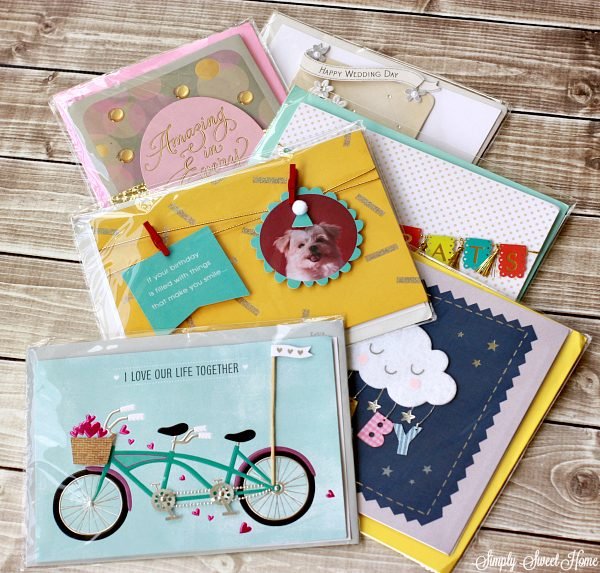
5. Create Kindness Cards

Spread encouragement and joy by working together to make handmade greeting cards. Fold construction paper in half and decorate the fronts with uplifting messages and images. Sign each card with an inspiring quote or note. Deliver the cards to nursing homes, hospitals, or anywhere they can brighten someone’s day. Making cards is an easy way to talk about spreading kindness.

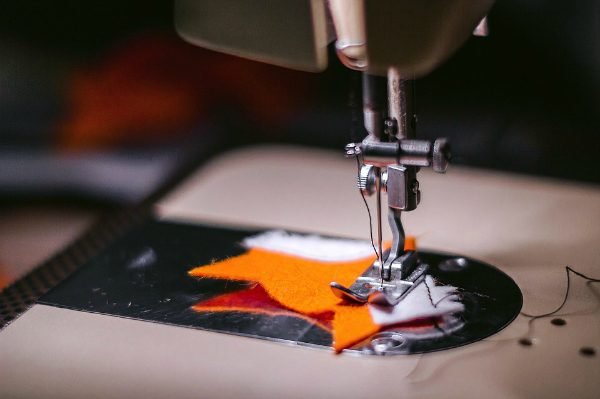
6. Make Decorative Felt Magnets

Cut fun shapes out of colourful pieces of felt. Let your foster child pick their favourite designs. Glue magnet strips onto the back of each felt shape. These handmade magnets can decorate fridges and other metal surfaces. It’s a simple craft that fosters creativity.

Doing arts and crafts together provides meaningful time for you and your foster child to connect. Allowing them to express their creativity also builds self-esteem. Keep these activities light-hearted by focusing more on the experience than the end result. Most importantly, have fun crafting memories as a foster family!

Super Quick Guide to Selling Handmade Crafts Online

Selling handmade crafts online is an excellent way to make money from your passion. However, it isn’t as easy as just sending something to someone who pays for it. First, of course, there must be a market. But there are also many legal issues and methods of exposure for success.

Find Something You Love to Do

Something can seem like a good idea at the time, but you can quickly grow bored. And if you are creating things purely for money, the quality won’t be there, and customers will know. One of the best methods is to create products you know you can happily spend all day with. For instance, if you love fun and easy macrame projects for beginners, start there. Or perhaps you have a passion for candle making. Whatever it is, try to ensure it’s something you love to do.

Finding a Niche Helps when Selling Handmade Crafts Online

If you want to start a business selling crafts, you probably already enjoy a hobby. This could be anything, like electronics, knitting, or making candles. On the web, people like to buy high-quality handcrafted goods. But there is a lot of competition in the market. So you need to think about how to make your items stand out. This means coming up with something unique to sell that people want. This is called a “niche” on the Internet, and it’s what you should focus on.

Learn the Basics of eCommerce

eCommerce is the trading of goods and services over the Internet. There are four main types you can base your business around. These are known as the following common areas:

  • B2B: Business-to-Business.
  • B2C: Business-to-Consumer.
  • C2C: Consumer-to-Consumer.
  • C2B: Consumer-to-Business.

As a craftsperson, you will most likely deal with the B2C system. Online site builders like Wix and platforms like Etsy make it easier than ever to do B2C eCommerce as a craftsperson. This is because they handle the technical side of things with your storefront, with integration options.

Build Your Crafts Around Your Brand

People who are new to business often forget how important it is to have a strong brand identity. It’s greater than simply having a company name and an emblem. It’s knowing who you are, what your story is, and what you believe in. A small business needs to have core values. And your brand should reflect this, from the name of your shop to the way you talk about your products on social media and in descriptions. You expand these in your tagline and the “About” page.

Learn the Laws Around Your Craft

As a crafter, it’s your job to make sure your products are safe and useful. But as a business owner, you also have to do things like make sure your business is following the rules. So, here are some things you should keep in mind if you want to stay out of trouble with local laws:

  • Spend some time setting up your tax payments as a sole trader.
  • Learn about the fire safety regulations in your country.
  • Specify if your products have a choking hazard for young children.
  • List all raw materials used in the making of your products.
  • Check toy safety laws where you make and sell your products.
  • Research copyrights, patents, and trademarks before starting your company.
  • Provide details of independent testing such as hallmarking.

There are, of course, many different ways to stay safe in business. And some rules depend on the country. If you sell things abroad, you also need to know about international laws. If you learn as much as you can before selling products, you can avoid getting in trouble.

Be Fair with Your Prices

Setting the right price for handmade crafts can be hard, and it depends on a lot of different things. Some of these are economic factors, trends, and the cost of materials. But there are some ways you can price your products in a fair way. First, you should figure out how much one of your products costs you to make and compare that to how much similar products sell for in retail stores. Then you can set the price for making a profit, but be mindful of what expectations.

Spend Time on Your Product Pages

Product pages are very important. Not just for people who visit your blog or seller platform but also for people who find you through search engines. When people find your site through search engines instead of paid ads, this is called “organic traffic.” You should also use “keywords” along with descriptions that are easy to read, honest, and clear. Keywords are words and phrases that are unique to your products and help search engines find your page based on search queries.

Find a Platform for Selling Handmade Crafts Online

As you may already know, there are a lot of websites where you can sell your crafts. Most people know about Etsy. There are also sites like Folksy, iCraft, and Handmade Amazon. These are your best choices because they are full of people who already want to buy handmade items. But you can also set up your own storefront for online shopping. It is more difficult and will take more time. But if you use a site builder like Shopify or Wix, you are in charge of everything.

Setup a Social Media Business Page

Word-of-mouth is a tried-and-true way to get people to notice you. And social media are a big part of modern life. If you are just starting out as a seller, social media is a great tool to use. This is because you can make a Facebook page for your business for free. But social media has a lot more to offer than just this. For example, you can talk to customers directly, get access to larger networks, and use free analytics tools to get specific demographic data about customers.

Summary

Selling handmade crafts online isn’t too challenging. But you can lose money and passion if you start off the wrong way. First, find something you love to create. Then learn about eCommerce and regulations. Finally, use platforms like Etsy and social media to promote your business.

Planning To Buy Fabric Online? Read This Guide Before

Ecommerce platforms have made it easy for us to shop for almost anything. Right from apparel to electronics, grocery to furniture, pet supplies to medicine — everything is just a few clicks away. Now you can even shop for fabrics online. 

Whether it’s the current pandemic that has forced you to stay home or you don’t have enough time to visit a fabric store yourself, online fabric stores solve your problems. These stores offer you an array of fabric options. 

But buying fabric from an online store is easier said than done. Finding a reputed online fabric store, understanding the scales, and not feeling the fabric against your skin may create some problems. But, owing to the current situation, it is much better than physically visiting the store. 

If you want to buy fabric online, these tips might help you. 

  • Research the store before you buy 

The first step to buying good fabric online is ensuring that the online store is genuine and reputable, and more so, if you want to place a bulk order. 

To know the reputation of the online store, check the reviews of other shoppers. See what’s their opinion about the website. Did they receive satisfactory services? Was the fabric quality fine? 

You can also get leads through online sewing forums. Once you find a good website, ensure to check out its policies. 

  • Buy fabric as per your sewing project 

Online fabric stores provide you with a wide selection of fabrics. Finding so many options may overwhelm you. Hence, be clear about what kind of fabric you want for your sewing project. 

If you are a beginner, opt for an affordable cotton fabric, easy to sew, and available in almost every color and pattern. You may find different options like quilting cotton (a stiff variant ideal for quilts) and apparel cotton (cotton lawn, Chambray, cotton velvet, etc.).

Linen is a great sustainable option for clothing, curtains, bedding, and tablecloths. For formal wear, go for silk or velvet. For supple garments, opt for a knit fabric, like a jersey. 

Other options that you will find on an online fabric store include polyester (clothing), rayon (clothing), satin (clothing, bedsheets, and furnishing), denim and canvas (outdoor furnishing, totes, etc.), felt (home décor, craft projects, and hats), fleece (blankets and stuffed toys), and flannel (blankets). 

Determine your requirements before buying fabric online. 

  • Buy a width conversion chart 

Your entire sewing project will be doomed if you land up with a fabric with the wrong width. Hence, buying fabric with the correct width is imperative. 

But, how do you know the width of the fabric? Here, a width conversion chart comes to your rescue. 

Every fabric comes with a different width. A width conversion chart will help you determine the width required for your sewing pattern, helping you buy the suitable fabric. 

  • Don’t miss the product description 

Most buyers happily hit the buy button upon checking the pictures of the product. They don’t take the pain of going through the product description and often end up with a substandard or altogether different product. 

Reading the product description is necessary to know the weight, length, width, and stretch of the fabric. The specification list entails a lot of information, like stretch level, dimensions, weight, spandex percentage, color, etc. Plus, it also includes shrinkage warnings and washing instructions. 

Go through the written information before you buy fabric online. 

The bottom line 

Whether you are starting your sewing business or want to sew a perfect dress for your best friend’s wedding, buying fabric can be a hard nut to crack. We hope these tips help you in finding the best fabric for your sewing project. 


Sewing and Quilting Tips for Beginners

Craft projects are an enjoyable and useful hobby, especially for people with skilled hands and creative minds. If you plan to get a sewing machine, visit sewinguru.com – sewing machine reviews can help you when buying this device for the first time.

Know that the sewing machine has several uses, not just for stitching clothes. For example, you can do patchwork or quilting. A quilt can be used in various ways and plays a significant role in a family tradition. For example, for every important event, you can sew a new piece of fabric using free embroidery designs, and so you have a fabric reminder that can be both decorative and useful.

Get Enough Fabrics

Making a quilt of three layers of fabric and sewed pieces of textiles seems like a lot of work. Quilting is actually one of the more affordable sewing projects. You can use various scraps of material, old clothes, linens, or whatever textile leftovers you have. 

Be prepared for the fact that you will need a lot of fabric in the beginning, because you’ll make a lot of mistakes. The remnants of the fabric can be used for training while trying to make perfect stitches. However, once you start the first real quilt, you’ll need new fabrics. The advice is always to get twice as much material as you need (if you can afford it, make it three times).

As a beginner, some common mistakes are possible, like wrong cutting off a piece of material, missed size, loose stitches, and so on. And the lack of material that would fit perfectly into the rest of the tapestry can be frustrating. So always have excess textiles.

For your first project, you should only get one type of fabric. Different weaves can affect the quality of the sewing, and it won’t be possible to apply the same seams everywhere. It’s a pretty complicated task for a beginner. So, for a smooth workflow, use cotton or linen fabrics. You can even use your old clothes to make them even more personal. Visit Project Repat to learn how to make a t-shirt quilt.

Washing Fabrics before Stitching

Another mistake that many beginners make is not to wash the fabrics before starting to make a quilt. If you don’t do that before sewing, you won’t know how the quilt will behave once you wash it. Colors smudging can occur on some fabrics, which can ruin your tapestry.

Wash each material separately, adhering to the instructions. Follow the advice to use materials that are washed with similar techniques and at similar temperatures to make a quilt. That way, there will be no running of fabric dyes.

Don’t Skip Pressing

If you skip this step, you may regret it when you notice that the seams on your quilt are uneven. You will make your job much easier if you iron each piece of fabric before you sow it. You need to work this step slowly and thoroughly.

On the next page, you can see some of the pressing methods that give the best results:

https://www.thesprucecrafts.com/accurately-press-quilt-blocks-and-quilts-2821458.

Don’t Complicate

You have seen many astonishing quilts that take your breath away with their beauty – doing something like that is a masterwork. One day, you will probably be able to do something like that, but you need to improve your skills until then. 

The big mistake that many beginners make is that they set themselves a high quilting goal. That can often be counterproductive, as a result is unlikely to be satisfying. Given the lack of quilting experience, you can expect that.

Quilting is one kind of art. Although it seems simple, it takes a long time to reach the skills needed for some more complicated projects. You can’t learn them all at once. So, make it easy for yourself and start with simple patterns.

As you progress, you can give yourself more complicated tasks. For example, let the first project be a quilt composed of only a dozen square pieces of fabric. When you have mastered this, increase the number of textile pieces, and play with their sizes. Keep in mind that, as a beginner, all pieces should be the same size to avoid sloppy and uneven stitches.

Play with color contrasts. The tapestry’s final look will be much better if you combine light and dark shades than if you made a kilt from similar colors. Get a mat big enough, and place pieces of fabric on it how you want to sew them on the quilt and take a photo of it. It will be much easier for you to follow a scheme like that.

Do Double Stitching

As a beginner, you probably don’t know all the tricks and catches of quilting. By making some obvious mistakes, you will remember that, for example, you should always do backstitching. The first time the quilt parts fall apart, you know that the next time you need to reinforce the seams.

Doing this job manually, with the help of a needle and thread, is too much work. With a sewing machine, all you have to do is reverse it to overleap extra seams on top of the first stitches. Make sure that all your seams have the same length (setting on the sewing machine). If you ‘cooperate’ with the lengths of the stitches, the result can be disappointing.

Take Care of the Sewing Machine

Making a quilt requires a lot of sewing work. It means that expendable machine parts, such as needles and rotary blades, will wear out quickly. A blunt needle or blade can make uneven seams, and you don’t want that at all. So always have these spare parts with you. To make all the seams look even, replace the needle and the rotary blade as soon as you notice they are blunt.

Making your own tradition and sewing a quilt by yourself is quite a demanding task. Don’t expect your first sewing project to be ‘wow,’ as it takes a lot of skill to make a majestic tapestry. It is necessary to follow the learning steps and accept the possibility that there will be many mistakes in the beginning.

Cool DIY Projects for Teen Boys

We all know that teenagers can be complicated sometimes, especially teen boys. This doesn’t mean that we shouldn’t interact with them or that we shouldn’t show them new and cool things to do. They also tend to get bored of certain activities and spend most of their time in front of the computer.

If you want to avoid seeing your teen at the PC all day, you might want to try a DIY craft with him. Working together on a cool and fun project will create a stronger bond between the two of you and will also enable his creative side to kick in. We’ve listed below a few DIY crafts that you can easily try with your boy. For more interesting suggestions on this topic, check out https://diyexperience.com/!

1. Splash Bomb Catapult

All teen boys need a catapult, especially in the summer to fight with water balloons. They can also use it in the winter to throw snowballs. While you might think that a catapult is very hard to make, especially for a boy, you are wrong. This is an easy and cool project for a teen boy.

For this craft, you are going to need 12 dowel rods, rubber bands, low temp glue gun, and a lid from a bottle of juice. Instead of the dowel rods, you can also use pencils but the pre-cut rods are better and stronger.

First step is to make a T shape using 2 dowel rods and rubber band. Then you need to make a square base for the catapult using one of the 2 dowel rods you previously tied. The T shape is

part of the shooting arm. Add a vertical dowel rod for every corner of the base and add another horizontal rod for the top of the shooting arm.

Connect all of the vertical rods just like you make a tent by using horizontal rods. Also, tie another rod to the shooting arm you make in the first step to make it longer. Glue the lid as an ammunition basket and the catapult is done.

2. Baseball String Bracelet

While some might think that bracelets are just for girls, this baseball string bracelet is great for boys. Plus, you only need 2 things for this craft: a baseball and a Xacto knife. For the part of the cutting, you might want to help your teenager to avoid any problems.

All you have to do is to cut near the stitches and ripe the leather material off the ball. Don’t cut on the stitches because you are going to use them later. After you got the material out, you need to keep only the part with the stitches. Cut the remaining part in 2 so that you can make 2 bracelets out of one ball. Usually half of the material is enough for the risk of a teen. Make sure to measure his wrist to see if it will fit.

The next step can be made by him without your supervision. All he has to do is to pull on both ends of the strings and tie them together. At the end, he will get a super bool bracelet made out of a baseball ball.

3. Duck Call

Also known as the neighbor annoyer, the duck call is an interesting craft that your teen can do in just a minute. This is by far the easiest DIY craft for teens. Another important thing is that he will only need a regular straw and a scissor. You might hate this DIY craft because it can be very noisy, but your son will definitely love it.

All he has to do is to flatten the straw at one end. He can also rub the straw on the edge of the table. After the straw is flat at one end, he needs to cut a point in the end of the straw. Cut both of the edges and at the end, he will have a sharp end and a regular end of the straw. Use the sharp end to blow. He will need to blow pretty hard to make it sound.

Hope we enjoyed the crafts we prepared for this article. Show them to your teen and ask him if he wants to try them out with you one day. This way, you will make sure that he loses interest in computer games and that he uses these crafts outside, in the yard to enjoy a bit of sun. If you

both enjoy doing these crafts, you might want to check out the internet for more projects you can do together.

A Stitch at a Time: Perfect Beginner Sewing Projects

Sewing Machine

Pixabay photo

Sewing as a pastime has grown a lot in recent years. People have always done it, but now people of all ages are starting to take an interest. If you want to start sewing, you might not know where to start. There might be something in particular that you want to make, such as clothes or home accessories. But if you’ve never sewn or only vaguely remember learning at school, getting started can be a bit daunting. Ideally, you need to know how to use a sewing machine and have some hand-sewing skills too. Choosing a couple of easy projects can help you to feel more confident and learn some of the basics.

Choosing Your Sewing Machine

Not every sewing project will require a machine. In fact, you could do everything by hand, if you wanted to, but everything would take longer. A machine makes your sewing quicker, easier, and more secure. First, you need to select the right machine for you. There are different types that can do all sorts of things, from basic stitches to embroidery. The best thing to do is start browsing online and reading reviews. Look at http://sewingmachinejudge.com/brother-cs6000i-sewing-machine-review/ for an example of a review that could help you make a decision. You probably don’t want anything too hardcore when you first start sewing, so don’t spend too much.


sewing

Pixabay photo

Tote Bag

When you’re ready to start sewing, a tote bag is an excellent first project. In fact, there are few things that are easier. You only need a couple of rectangles of fabric, plus some long strips for the handles. It’s also a great project to do with recycled material if you have anything you’re thinking of using. You can use an old beach towel or even a large t-shirt or shirt to make yourself a bag.

Tablet or E-reader Cover/Case

Along the same lines as a tote bag, a case for your tablet or e-reader is super simple. You only need to stitch a couple of pieces of fabric together. At the top, you might want to insert a button or even a zip. Perhaps you can add a foldover flap to cover the top up too.

Baby Blanket or Quilt

Quilting is a favorite type of sewing for many people. If you want to get started with it, making a small quilt for a crib is a good idea. You can keep your project manageable and pick up some valuable skills. You could also make a blanket, which can be even easier. Pick your fabric, cut it size and neaten the edges, plus add any embellishments. Try http://www.diynetwork.com/how-to/make-and-decorate/crafts/easy-sewing-project–how-to-make-a-double-sided-baby-blanket to find an easy project.

stitching

Pixabay photo

Simple Skirt

If you want to start making clothes, a skirt is one of the easiest garments you can start with. You don’t even have to insert a zip if you don’t want to (use an elastic waist instead), although it’s easy to do using a special zipper foot on your sewing machine. One of the easiest things to do is to copy a simple skirt that you already like to wear.

There are so many beginner’s sewing projects you can try if you’re just getting started with sewing. Pick one that appeals to you to start building some skills.

Friday Favorites Linky Party – Week 349

Happy December, Friends! Welcome to this week’s Friday Favorites party! This week we have so many fun ideas for the holidays! I’m sure that you will enjoy each and every one of them!  Please take a moment to look around, and as always I invite you to share your ideas with us so that we may feature you here!

PS – Please be sure to tune in for next week’s party, where we will have a fun Christmas giveaway from my Etsy shop!

 photo Friday Favorites Banner 2.jpg

Please support and follow our lovely blog party hostesses:

Jerri at Simply Sweet HomeTwitter | FB | G+ | Pin | Inst

Christine at Light and SavvyTwitter | FB | G+ | Pin | Inst

Jen at Creatively HomemadeTwitter | G+ | Pin

Dawn at LeroyLimeTwitter | FB | G+ | Pin | Inst | BL

Maisy at Becoming AliceFB | G+ | Pin

Sheree at Stage PresentsTwitter | FB | Pin | Inst | Inst

Lisa at Condo BluesTwitter | FB | G+ | Pin | Inst

Amy at A Day of Small ThingsPin

Penny at Penny’s PassionTwitter | FB | G+ | Pin | Inst

Kelly at Under a Texas SkyTwitter | FB | G+ | Pin | Inst | BL

If you are featured this week, be sure and grab a featured button for your blog!

 photo Friday Favorites Featured Button.jpg

You can show your love for this week’s favorites by going over and commenting on the posts and by pinning or sharing!

And if you love all of this week’s favorites, please pin, share, and invite your friends to this week’s linky party! [Read more…]

DIY No Sew Pet Blanket and Pet Stockings with Purina

This shop has been compensated by Collective Bias, Inc. and its advertiser. All opinions are mine alone. #ToPetsWithLove #CollectiveBias

diy-no-sew-pet-blanket-and-pet-stockings-with-purina

When I go out shopping these days, the aisles are decked with Christmas decorations and great gift ideas.  I can’t help but get in the spirit of the season and start planning my holiday shopping list.  And as I get ready to prepare my gift list, I always include my four legged family members!  The Simply Sweet Home dog and cats get a stocking each year, filled with food, treats, and toys.  And we have a good time watching as they receive these gifts.  Today I’m going to show you how a few products from Purina can help you to make your pets Christmas merry and bright!  And I’m going to share a tutorial for a DIY Pet Blanket, the perfect handmade gift for your dog or cat.

[Read more…]

Homegating with Skittles® and Printable Football Party Activities

This shop has been compensated by Collective Bias, Inc. and its advertiser, Mars, Incorporated. All opinions are mine alone. #CallAnEatible #SkittlesHomegating #CollectiveBias

Homegating with Skittles

My family is so excited about football season being back again! How about you?  Each week of football season, we watch many games, but our favorite thing to watch is college football on Saturdays, and for this, we always like to have a lot of food and snacks on hand!  With football season starting in September and going through and past the New Year, I find it’s important to mix things up and come up with great menu items each week.  For example, we may have pizza and wings one week, and the following week we may have pulled pork sandwiches or hamburgers and hot dog.

But for me, football food doesn’t always have to be about the savory; it can also be about the sweet.  For the sweet, I like everything from fruit and cream cheese dip to cupcakes and cookies, to candy!  For the first Saturday of college football, we had an array of delicious foods to serve, including one of my favorite candies, Skittles®.  Today I’m going to show you some ideas for homegating with Skittles.  I’ll show you how I added Skittles to our party menu, and I’m going to show you how you can use Skittles to bring a little fun to the party! [Read more…]

New Driver Gift Basket Tutorial

This shop has been compensated by Collective Bias, Inc. and its advertiser. All opinions are mine alone.  #CelebrateAmazingBDays #CollectiveBias

American Greetings Lilypad cards

Don’t you just LOVE birthdays?  As a wife, mom, and all around girly-girl, I love gift giving, and I believe great looking wrapping paper, packaging, and the perfect card are an essential part of the gifting process and the whole celebration!  American Greetings has some fabulous product offerings to help you celebrate everything from birthdays, to anniversaries, new babies and more!  Above I’ve shared a photo of a few American Greetings cards I have on hand!  Aren’t they adorable?  They are from the Lily Pad Press line of American Greetings.

Boy by Wall

We have a few summer birthdays in our family, but the one that definitely gets the most attention is our teenage son, Noah’s.  Noah will be 16 in just 2 weeks!  And you know what that means…it’s driver’s license time!  His car is being delivered to us on Saturday, but because I love shopping for gifts, I couldn’t wait…I had to get new some special new driver gifts to go with the car!  Today I’m going to show you everything that went in to making his New Driver Gift Baskets!

[Read more…]